Let's review how debounce works. If you'd like a deeper understanding of the concept, check out my previous post, 'Debounce vs Throttle'!
Debounce waits for a specified amount of time after the last event fires, then executes the callback with that final event. This approach of handling the last event is called the trailing method, while selecting the very first event is called the leading method.
1) Implementing in Vanilla JavaScript
So how do we actually implement debounce?
After searching around, I found that vanilla JavaScript examples generally fall into two categories. The code looks different, but the underlying principle is the same:
Event fires → if the same event fires again within the waiting time, cancel the previous timer and create a new one; if no event fires within the waiting time, the timer survives and the callback executes.
That's the core mechanic of debounce.
As mentioned, there are two common patterns in vanilla JavaScript. Let's start with the simpler one.
Example 1: Storing the Timer in a Global Variable
The first approach is straightforward — store the timer ID in a global variable. When an event fires within the waiting period, call clearTimeout on the stored timer, then assign a new timer ID with setTimeout. The debounce function itself runs on every event.
<!DOCTYPE html>
<html lang="en">
  <head>
    <meta charset="UTF-8" />
    <meta name="viewport" content="width=device-width, initial-scale=1.0" />
    <title>example 1</title>
  </head>
  <body>
    <input type="text" id="input" />
    <script>
      const inputField = document.getElementById('input');

      let debounceTimer; // store the timer ID in a global variable

      const debounce = (callback, time) => {
        clearTimeout(debounceTimer); // cancel the stored timer
        debounceTimer = setTimeout(callback, time); // assign a new timer to the global variable
      };

      const inputHandler = (e) => console.log(e.target.value);

      inputField.addEventListener(
        'input',
        (e) => debounce(() => inputHandler(e), 500) // run debounce on every event
      );
    </script>
  </body>
</html>
To see how this works, let's add some console logs:
const inputField = document.getElementById('input');

let debounceTimer;

const debounce = (callback, time) => {
  console.log('debounce called');
  clearTimeout(debounceTimer);
  debounceTimer = setTimeout(callback, time);
};

const inputHandler = (e) => {
  console.log('callback called');
  console.log(e.target.value);
};

inputField.addEventListener('input', (e) =>
  debounce(() => inputHandler(e), 500)
);
When you type quickly:
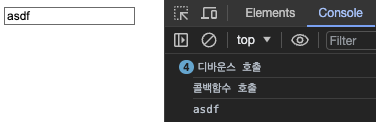
You can see that the debounce function is called on every event, but the callback only runs once at the end.
This approach has the advantage of being very simple, but its downside is poor scalability due to storing the timer ID in a global variable. If you need to apply debounce to multiple events, you'd have to define a separate global variable and debounce function for each one.
Let's look at the second example, which addresses that limitation.
Example 2: Using Closures
The second approach leverages JavaScript closures. Simply put, a closure is a phenomenon in nested functions where the inner function retains access to the outer function's variables even after the outer function has finished executing.
By using a closure, we can keep the timer ID as private internal state of the outer function, hidden from the outside world. This makes the debounce function much more reusable — when the debounce function runs, the timer ID is created as internal state, so you no longer need to define multiple variables and functions like in the first example.
That might sound abstract. Let's jump straight to the code.
- Full code
<!DOCTYPE html>
<html lang="en">
  <head>
    <meta charset="UTF-8" />
    <meta name="viewport" content="width=device-width, initial-scale=1.0" />
    <title>example 2</title>
  </head>
  <body>
    <input type="text" id="input" />
    <script>
      const inputField = document.getElementById('input');

      const debounce = (callback, time) => {
        let debounceTimer;

        return (...args) => {
          clearTimeout(debounceTimer);
          debounceTimer = setTimeout(() => callback.apply(this, args), time);
        };
      };

      const inputHandler = (e) => console.log(e.target.value);

      const debouncedHandler = debounce(inputHandler, 500);

      inputField.addEventListener('input', debouncedHandler, 500);
    </script>
  </body>
</html>
- The debounce function
Let's zoom in on just the debounce function from the full code above.
const debounce = (callback, time) => {
  // debounce is the outer function
  let debounceTimer; // timer ID stored as internal state

  return (...args) => {
    clearTimeout(debounceTimer); // the inner (returned) function remembers and uses the outer function's variable when it runs
    debounceTimer = setTimeout(() => callback.apply(this, args), time); // apply preserves the this context
  };
};
This debounce function takes a callback and time as arguments:
callback: the function to execute when the event fires — this is what we want to throttletime: how long to wait (in milliseconds) before executing the callback (the delay)
It returns a function that, when called, cancels the previously stored timer (discarding the pending callback from the last event) and schedules a new callback execution for the current event.
What is
apply(this, args)...?
apply is used so that the returned function executes in the same this context it originally had, regardless of how or where it's called, while also forwarding all arguments unchanged.
This is necessary because of how JavaScript dynamically binds this — it depends on how the function is called. To control or change a function's this context, you need to use call or apply.
Without apply, calling callback(...args) directly could result in callback's this being the global object or undefined. That said, this only matters when the callback actually uses this. If your callback never references this, there's no need to preserve the context with apply.
- Using the debounce function & how it works
Let's look at just the JavaScript part of the full code from the top:
const inputField = document.getElementById('input');

const debounce = (callback, time) => {
  let debounceTimer;

  return (...args) => {
    clearTimeout(debounceTimer);
    debounceTimer = setTimeout(() => callback.apply(this, args), time);
  };
};

// function to call when the 'input' event fires
const inputHandler = (e) => console.log(e.target.value);

// inputHandler with debounce applied
const debouncedHandler = debounce(inputHandler, 500);

inputField.addEventListener('input', debouncedHandler, 500);
Here's a breakdown of the key parts:
const inputHandler = (e) => console.log(e.target.value);
- The function called when the
'input'event fires console.logis temporary — just to observe how the callback's execution frequency is being controlled- In a real use case, this is where you'd put something like an API call for autocomplete suggestions
const debouncedHandler = debounce(inputHandler, 500);
- Calls the
debouncefunction and assigns the returned debounced function to a variable - This function holds a closure with access to the internal state (the timer)
inputField.addEventListener('input', debouncedHandler, 500);
debouncedHandleris called every time the'input'event fires- Each call runs the function returned by
debounce, which performsclearTimeoutandsetTimeout
The key thing to note here: debouncedHandler runs on every input event, but the execution of the actual callback is controlled by debounce.
const inputField = document.getElementById('input');

const debounce = (callback, time) => {
  console.log('debounce called');
  let debounceTimer;

  return (...args) => {
    console.log('debounced function called');
    clearTimeout(debounceTimer);
    debounceTimer = setTimeout(() => callback.apply(this, args), time);
  };
};

const inputHandler = (e) => {
  console.log('callback called');
  console.log(e.target.value);
};

const debouncedHandler = debounce(inputHandler, 500);

inputField.addEventListener('input', debouncedHandler, 500);
When we type very quickly to check the execution frequency of debounce, the debounced function (debouncedHandler), and the callback (inputHandler):

The console output confirms it! debounce runs exactly once at the start, the debounced function fires on every 'input' event, and the callback executes only once at the very end.
2) Implementing in React (feat. Custom Hooks and Trial & Error)
This section does NOT jump straight to the "correct code." It walks through the trial-and-error process of implementing debounce in React, so if you're in a hurry, scroll down to the Final Code section!
Now let's take the vanilla JavaScript examples from above and port them to React. They were so simple — surely this will be easy. Right?
Well, I tried copying the vanilla JS approach into React, and it turned out to be much harder than expected. The reason? React uses state. State updates are batched and applied after rendering, which caused debounce to behave in completely unexpected ways. I ended up writing nine different example versions through trial, error, and lots of Googling before arriving at the final solution. (Productive struggle, I'd say.)
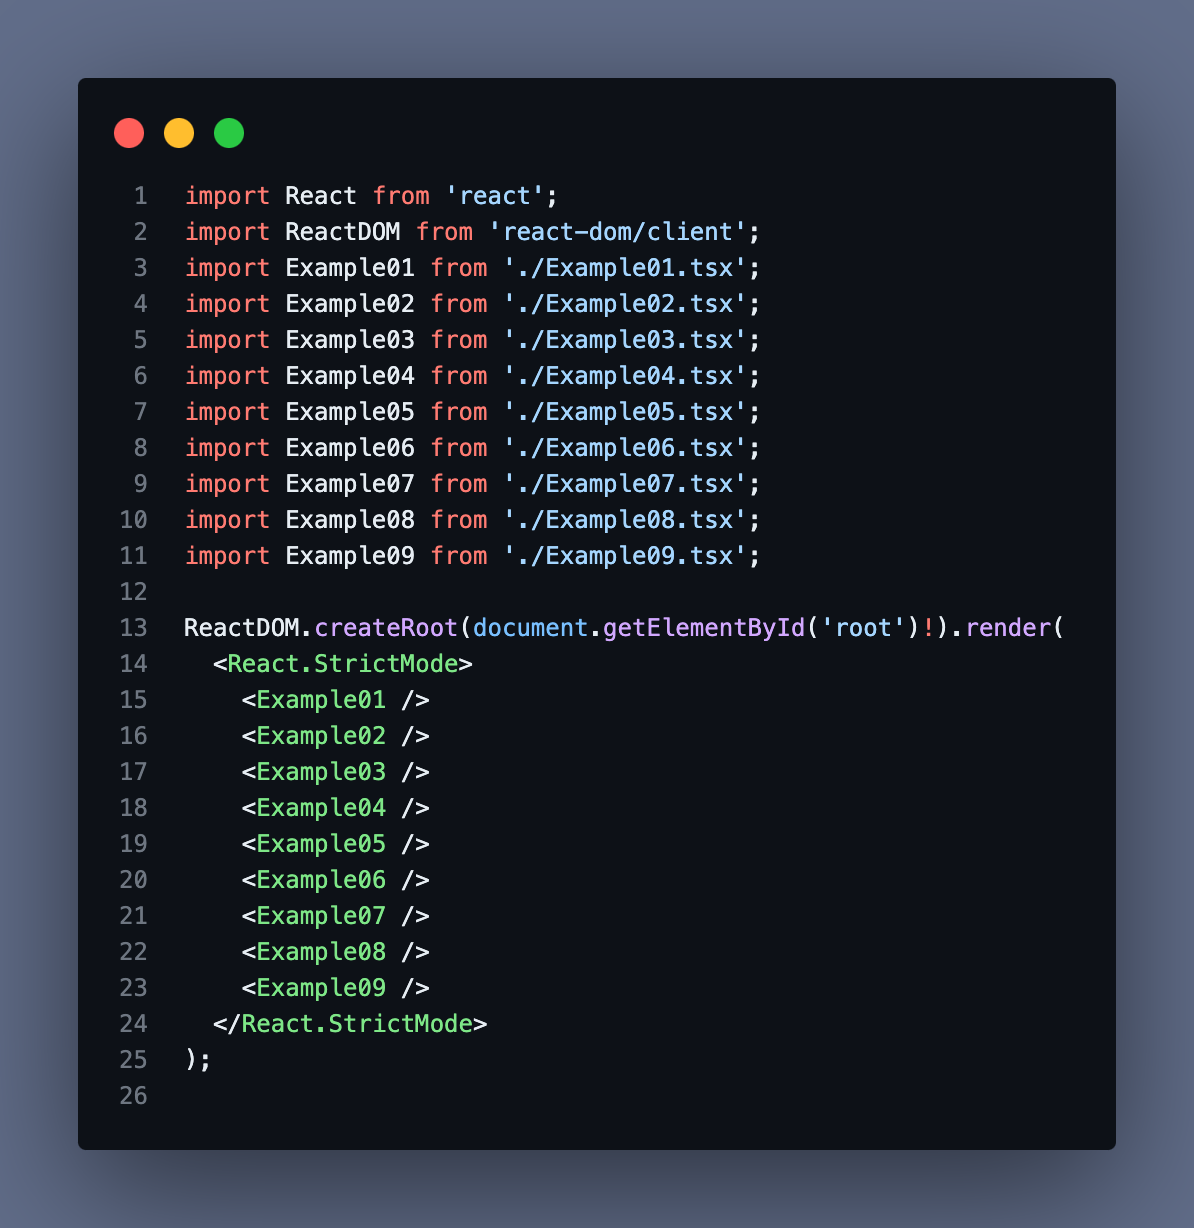
Evidence of the struggle...
I won't cover porting the global-variable approach to React since it's too straightforward. (One note though: in React you need useState or useRef instead of a plain variable — if you define it inside the component function, it gets reset to undefined on every render.)
For this section, I'll use a text input's onChange event as the example. The basic setup looks like this:
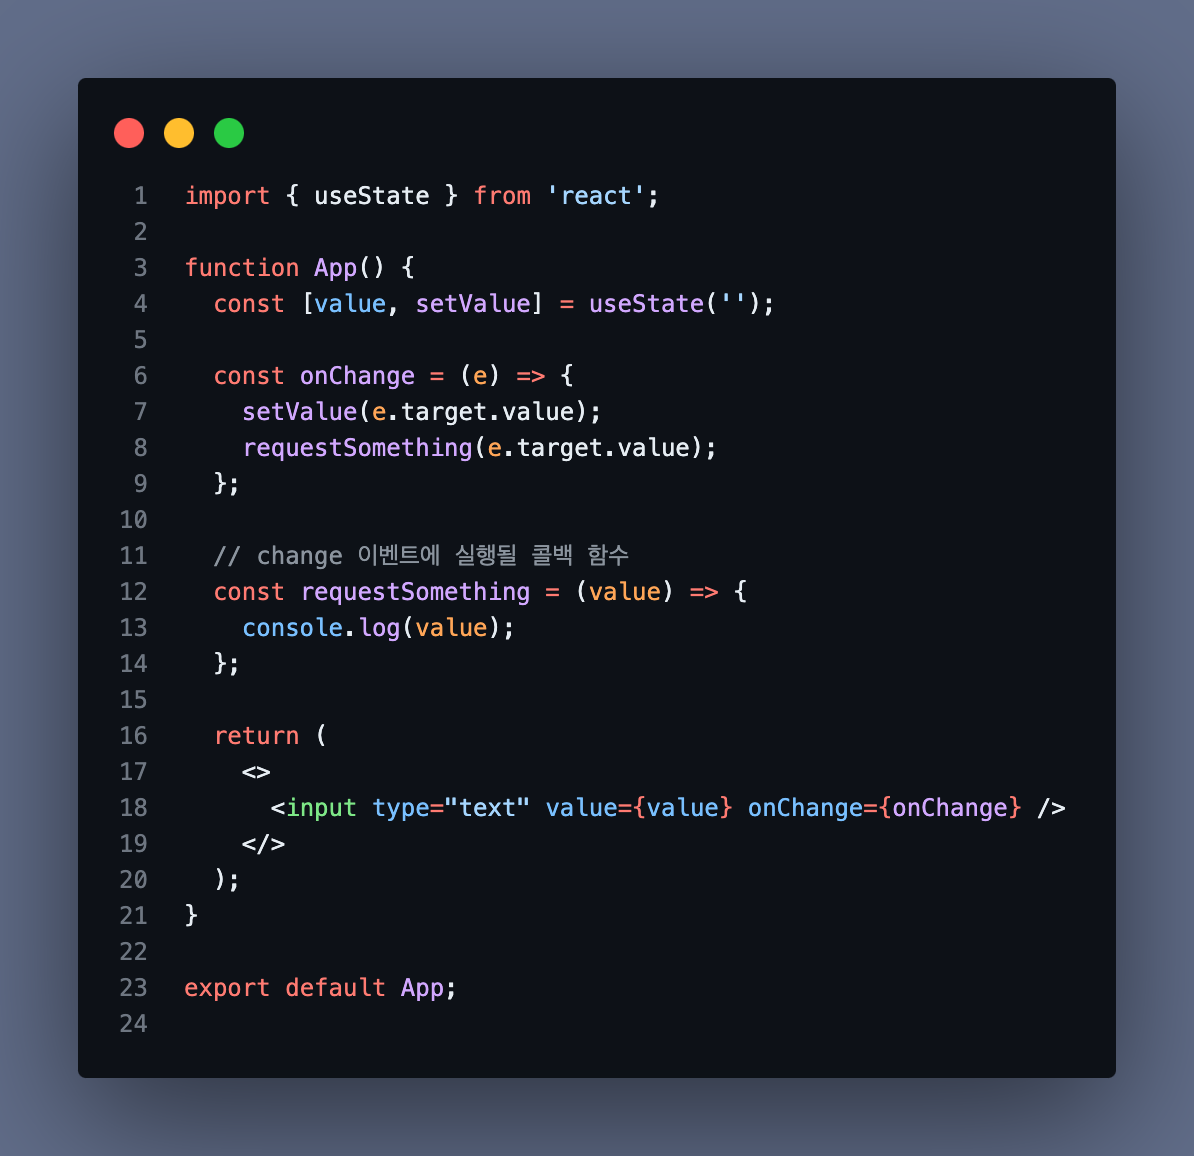
We'll build on this foundation, applying debounce step by step — first inside the component, then extracted into a custom hook.
Step 1. Direct Port of the Closure-Based Debounce
Let's just copy it over as-is.
function App() {
  const [value, setValue] = useState('');

  const onChange = (e) => {
    setValue(e.target.value);
    requestSomething(e.target.value);
  };

  const requestSomething = (value) => {
    console.log(value);
  };

  const debounce = (callback, time) => {
    let debounceTimer;

    return (...args) => {
      clearTimeout(debounceTimer);
      debounceTimer = setTimeout(() => callback.apply(this, args), time);
    };
  };

  const debounceOnChange = debounce(onChange, 500); // apply debounce to the entire onChange

  return (
    <>
      <input type="text" value={value} onChange={debounceOnChange} />
    </>
  );
}
This doesn't work at all the way we want. Why? Because we typically store the input value in state (setValue(e.target.value)), and that logic should run on every single event — it should NOT be debounced.
In other words, we don't want to debounce the entire onChange handler. We only want to debounce requestSomething(e.target.value).
Step 2. Apply Debounce to the Callback, Not the Whole Event Handler
Let's refactor so that only requestSomething(e.target.value) is debounced.
function App() {
  const [value, setValue] = useState('');

  const onChange = (e) => {
    setValue(e.target.value);
    debounceRequest(e.target.value); // use the debounced version of requestSomething
  };

  const requestSomething = (value) => {
    console.log(value);
  };

  const debounce = (callback, time) => {
    let debounceTimer;

    return (...args) => {
      clearTimeout(debounceTimer);
      debounceTimer = setTimeout(() => callback.apply(this, args), time);
    };
  };

  const debounceRequest = debounce(requestSomething, 500); // apply debounce to requestSomething

  return (
    <>
      <input type="text" value={value} onChange={onChange} />
    </>
  );
}

export default App;
Does this work correctly now? Still no. This time, debounce doesn't seem to be applied at all. The console shows:
There's a slight delay, but requestSomething fires on every single event. Why?
Because state changes trigger component re-renders!
We store the input value in state via setState(e.target.value) on every change event, and each state update causes the component to re-render. On every re-render, debounce is called again, creating a brand new debounceRequest. Each new debounceRequest forms a new closure over a new debounceTimer, so each call references a different timer — there's no single shared timer to clearTimeout. (For the closure approach to work correctly, every call to debounceRequest must reference the same debounceTimer from the same closure.)
Unlike the vanilla JS example where debounce ran only once and worked perfectly, here the debounce function runs on every change event.
To fix this, we need to guarantee that
debounceRequestis created only once.
There are two main approaches:
- Define the function outside the component to prevent re-creation
- Use
useCallbackanduseMemoto memoize
Step 3. Preventing Re-creation — Define Outside the Component
Let's try the first approach: moving the relevant functions outside the component function.
function App() {
  const [value, setValue] = useState('');

  const onChange = (e) => {
    setValue(e.target.value);
    debounceRequest(e.target.value);
  };

  return (
    <>
      <input type="text" value={value} onChange={onChange} />
    </>
  );
}

export default App;

const debounce = (callback, time) => {
  let debounceTimer;

  return (...args) => {
    clearTimeout(debounceTimer);
    debounceTimer = setTimeout(() => callback.apply(this, args), time);
  };
};

const requestSomething = (value) => {
  console.log(value);
};

// defined outside the component
const debounceRequest = debounce(requestSomething, 500);
The debounce-related logic is now moved outside the component function.
This works exactly as expected!
Step 4. Preventing Re-creation — Using useCallback and useMemo
Now let's try the second approach: using useCallback and useMemo to prevent re-creation.
Where should we apply memoization?
The culprit was debounceRequest being recreated on every re-render. And what we want to memoize is not the function itself but the return value of calling debounce. That means we should use useMemo, not useCallback.
import { useMemo, useState } from 'react';

function App() {
  const [value, setValue] = useState('');

  const debounce = (callback, time) => {
    let debounceTimer;

    return (...args) => {
      clearTimeout(debounceTimer);
      debounceTimer = setTimeout(() => callback.apply(this, args), time);
    };
  };

  const onChange = (e) => {
    setValue(e.target.value);
    debounceRequest(e.target.value);
  };

  const requestSomething = (value) => {
    console.log(value);
  };

  // memoize the return value of debounce with useMemo
  const debounceRequest = useMemo(() => {
    return debounce(requestSomething, 500);
  }, []);

  return (
    <>
      <input type="text" value={value} onChange={onChange} />
    </>
  );
}

export default App;
Adding console logs to useMemo, debounce, and requestSomething:
Works great!
But is this the best we can do?
Debounce is working correctly, but the code feels messy. Does all the debounce logic really need to live inside the UI component? Since this logic will likely be reused elsewhere, it's worth extracting it into a custom hook.
Step 5. Extracting Into a Custom Hook
const debounce = (callback, time) => {
  let debounceTimer;

  return (...args) => {
    clearTimeout(debounceTimer);
    debounceTimer = setTimeout(() => callback.apply(this, args), time);
  };
};
Let's take the debounce function we've been using and turn it into a custom hook.
// useDebounce hook
const useDebounce = (callback, delay) => {
  let debounceTimer;

  return (...args) => {
    if (debounceTimer) {
      clearTimeout(debounceTimer);
    }

    debounceTimer = setTimeout(() => {
      callback.apply(this, args);
    }, delay);
  };
};

// component
function App() {
  const [value, setValue] = useState('');

  const onChange = (e) => {
    setValue(e.target.value);
    debouncedRequest(e.target.value);
  };

  function requestSomething(val) {
    console.log(val);
  }

  const debouncedRequest = useDebounce(requestSomething, 500);

  return (
    <>
      <input type="text" value={value} onChange={onChange} />
    </>
  );
}

export default App;
Will this work? (Fingers crossed...)
Debounce still isn't working properly. The reason is the same as in Step 2:
- A change event fires → state updates
- State updates → component re-renders
- Component re-renders →
useDebounceruns again useDebounceruns again → a newdebounceTimeris created
As a result, we can never cancel the previously created timer.
So how do we make useDebounce reference the same debounceTimer across calls instead of creating a new one each time?
useRef!
useRef isn't just for storing DOM references — it's also perfect for persisting a value between renders. The key difference from useState is that updating a ref does not trigger a re-render. Using useRef to hold a reference to a timer or interval ID is actually an officially documented use case in the React docs (link).
Step 6. Using useRef to Persist the Timer ID (Final Code)
// useDebounce hook
function useDebounce(callback, delay) {
  const debounceTimer = useRef(null);

  return (...args) => {
    if (debounceTimer.current) {
      clearTimeout(debounceTimer.current);
    }

    debounceTimer.current = setTimeout(() => {
      callback.apply(this, args);
    }, delay);
  };
}

// component
function App() {
  const [value, setValue] = useState('');

  const onChange = (e) => {
    setValue(e.target.value);
    debouncedRequest(e.target.value);
  };

  const requestSomething = (val) => {
    console.log(val);
  };

  const debouncedRequest = useDebounce(requestSomething, 500);

  return <input type="text" value={value} onChange={onChange} />;
}

export default App;
Adding console logs to useDebounce, the callback, and the referenced timer ID:
Everything works exactly as intended!
You can see that useDebounce runs on every change event. The first time it runs, the timer ID is the initial value null. From that point on, each subsequent call references the timer ID stored by the previous call.
Wrapping Up
Going through this process of implementing debounce step by step in React gave me a much deeper understanding of not just the debounce technique itself, but also how React component rendering actually works.
An unexpected bonus was finally getting a firm grasp on closures. Even after studying them, I was never quite sure I truly understood them — but working through this made it click.
Next time, I'll walk through throttle examples and the process of implementing it in React!
References
https://onlydev.tistory.com/151
https://webdesign.tutsplus.com/javascript-debounce-and-throttle--cms-36783t
https://velog.io/@soulee__/Javascript-쓰로틀링-디바운싱-throttle-debounce